Back: Steve Marsh's Caterham page
I spent some time looking at how to make a foam seat on the blatchat archives - all the information is there, but I have tried to pull it all together in one place
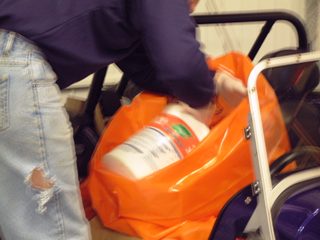
Treat everything that comes in contact with the foam as disposable - you won't get it off.
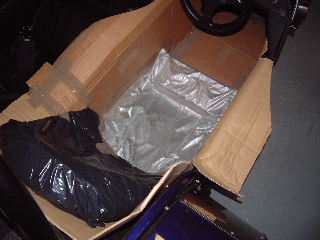
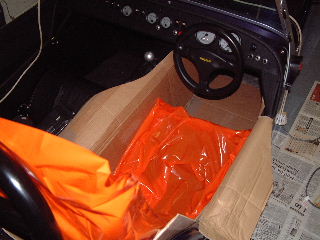
First, mask off the inside of the cockpit in case there is any leakage. The cardboard down the sides also allows a gap between the cockpit walls and the seat so you can move the seat to and fro.
Then mask off the base of the seat (available from Oxted Trimming, £20)

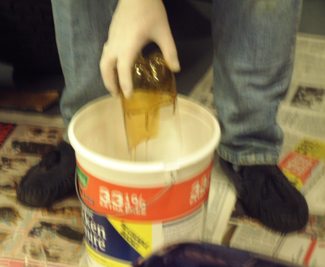
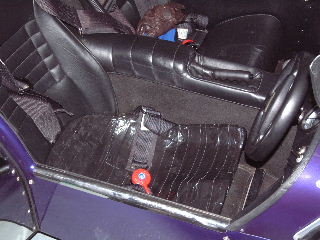
Put the base inside a large polythene bag and put it in position in the car. I used a survival bag from Millets, strong, long enough to avoid overflow and easy to peel off afterwards
The chemical reaction needs warmth to help it along, so if you are doing this in a cold garage, use a heater to warm it up (20deg is ideal, but I was OK at 15 deg)
Go to the toilet (This is important!)
Have a radio handy and something to read - you will be in the car for about 20 mins while it sets
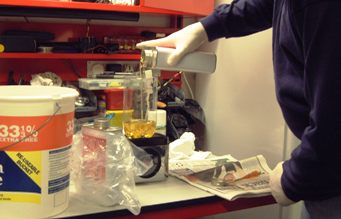
Weigh out the ingredients (300g of each for a seat base only), mix them and once it goes a milky colour and is starting to foam, pour the mix into the base. (Make sure that you actually pour it into the base inside the bag - don't just pour it down the bag as it won't fill the seat base properly) Work quickly - it only takes 30 seconds or so after mixing starts before it starts to foam, but give it about a minute before sitting on it as otherwise you just squeeze all the foam out of the base! Also, try and keep creases out of the bag as otherwise the creases will be trapped inside the foam (not a problem as you can just cut it away, but goodbye bag...)
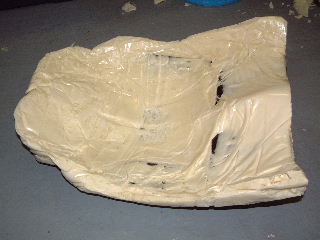
Once it has set (I left it another 10 minutes after getting out of the car) you can peel off the bag and cut off any excess foam with a kitchen knife. It is easy to cut and shape. If there are any gaps it is easy to mix a small amount of foam, pour in into the gaps and repeat the process (check the bag for any nicks first - seal them with tape).
This is my finished seat, before covering
I then covered it with Duck tape to protect it from the weather and wear and tear in use
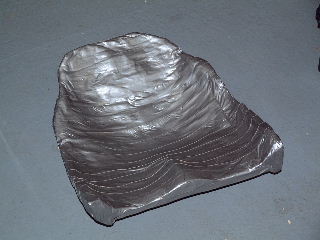
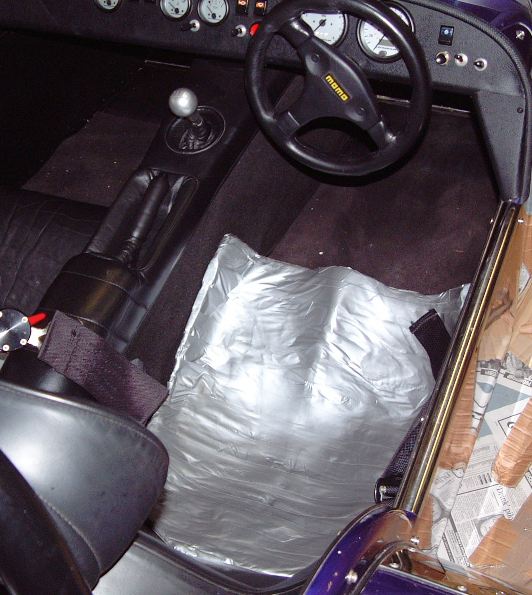
The finished item looked naff in the car….
So I recovered it with black tape - much better now!
The seat really does fit me well - there is only one comfortable driving position. I now have lots of clearance above my head, which will give me the required 5cm between the top of the roll bar and the helmet, although there is much less clearance between my knees and the steering wheel. I also have excellent lumbar support, which was not good with the standard S-Type seat (I can't sit fully upright as I would then be looking through the top of the screen).
What would I do differently if I did it again?
Thanks to Stephen Grant for pointing out where my instructions could have been clearer.
Last update: 25 May 2005