Back: Steve Marsh's Caterham page
Background
I wanted to install a power socket on my Seven for two reasons:
In order to fulfil the first requirement, I had to find an 'always on' power cable under the dash. A little experimentation showed that I could probably use the horn circuit, but in the end I decided to wire the unit directly to the battery using 17A cable. This was mainly because I didn't like the thought of making a mistake trying to tap into the main wiring loom and in the end, chasing a cable through the transmission tunnel (where the big red cables go through) was much easier than I thought that it was going to be.
This web page shows you how I went about installing the socket on my Seven.
What will you need?
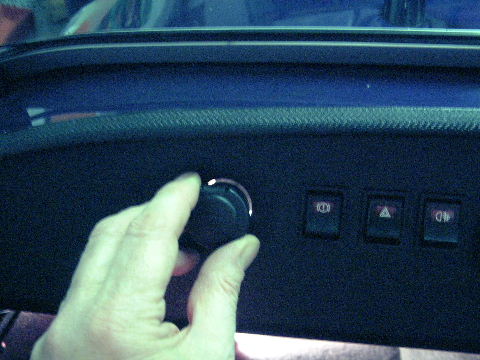
I started by deciding where on the dash I wanted the socket. I put mine in line with the switches in front of the passenger. This is also conveniently near the fuse box and has a lot of space behind it (which means you won't drill through the wiring loom!
Having decided where it was to go, I covered the area with Duck tape, marked out the hole I wanted to cut out and then drilled (carefully) just insider the perimiter of the mark to remove most of the metal. I then finished off the hole with a curved file, taking a bit off at a time until the hole was just big enough for the power socket.
I found that it was easy to tell where to file if I put a light behind the dash and then inserted the socket. The area(s) where you can't see any light is the place to file!
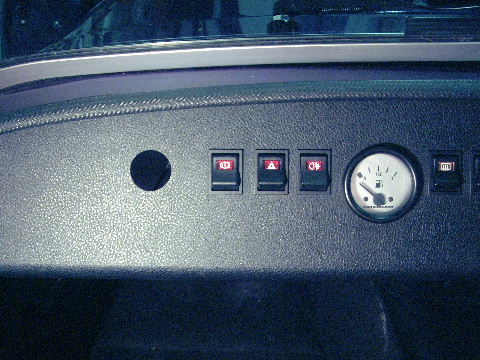
While it looks messy initially, this method leads to a very tidy hole
The next step is to put the wiring in. I first chased a cable through from the transmission tunnel to the battery and soldered a 6mm 20A terminal connector on to the battery end. Don't connect it to the battery yet, unless you want to try some impromptu spot welding with the cable! As an additional precaution I wired a 20A in-line fuse into the cable just after it leaves the battery - this will protect the cable if there is a short at some point in the future.
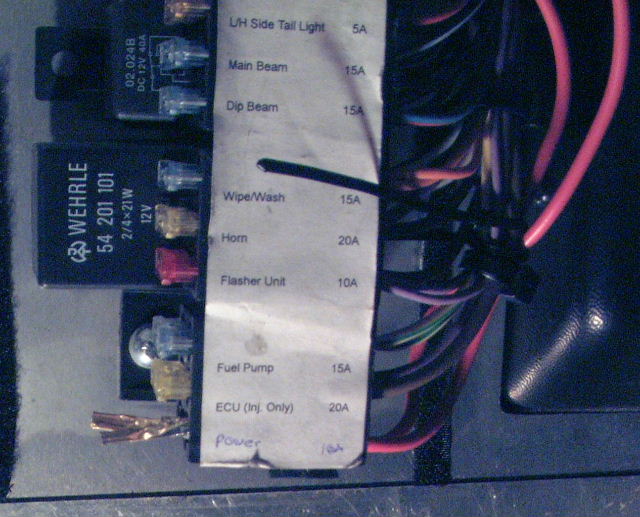
On my 1.8vvc, the last slot in the fusebox is not used, so I ran the cables through to this and made some fuse connectors out of some spare connectors I had from my RadioControl racing stuff.
Once the fuse is installed, the connectors are inside the fuse box. In the following picture you can also see the wiring connected to the socket and the -ve connection.
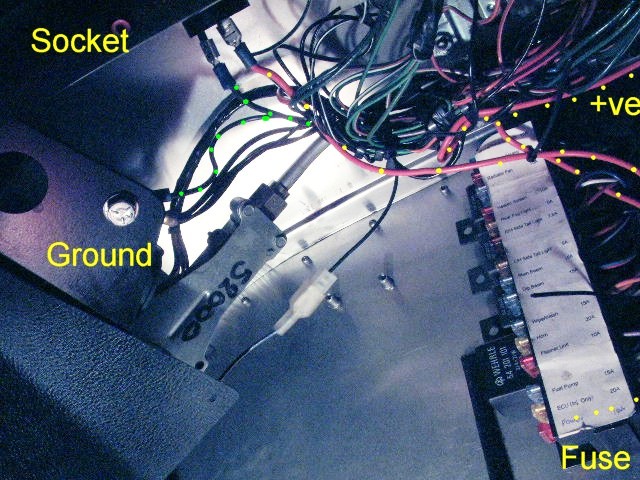
Once it has been cabled up, check the connections with a multimeter - especially that the +ve cable is isolated from the ground. If it is, then connect up the terminal to the battery. That's it!
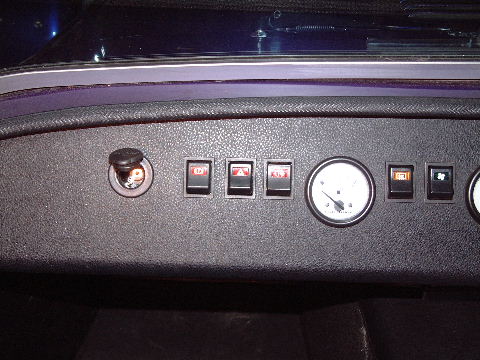
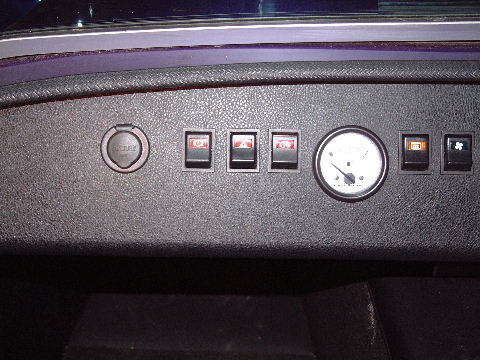
As you can see, the finished item does not look out of place on the dash - well at least I think so!
![]()
![]()
Last update: 10 April 2005